PF-technique
(Difficulty level 1 – Beginner)
Download instructions here:
The PF-technique aka BRF-Tek (Brown Rice Flour technique) is a method developed by hobby mushroom cultivators for growing mushrooms in the simplest way. Over the last decades many different versions of this method have developed.These instructions are based on our experience. The substrates are inoculated with spores. In the next phase, the fungal mycelium colonizes the ´substrate cakes´. As soon as the cakes are fully colonized, they can be set up for fruiting.
PRODUCE PF-SUBSTRATES YOURSELF
PREPARATION
Mushrooms require a suitable substrate for fruiting. Substrate preparation should be particularly clean and sterile, otherwise the substrate can easily be infested by mold or bacteria. Contamination destroys not only the fungi but also the substrate an makes it unusable.
Recommended Accessoires:
- Jars or Measuring cup
- Drill/nail
- Vermiculite
- Brown rice flour
- Spore syringes (note, not all spores grow on PF substrate)
- water
- Pressure cooker, aluminum foil, Bacillol & cloth
- Container for mixing
1. Mix substrate
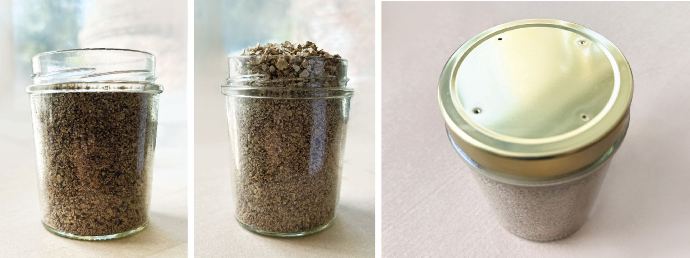
Mix 1 liter (approx. 700 g) of rice flour and 3 liters of dry vermiculite, then add 1 liter of hot, not boiling water and mix again until a loose crumbly, evenly moist mass is formed. This makes 5 liters of PF substrate for approx. 12 jars (approx. 400 ml).
2. Fill substrate
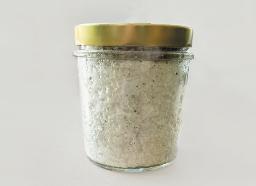
Fill the ready-mixed substrate into jars by hand and press down lightly with your fingers. There should only be small cavities. Therefore, the substrate should not be pressed down too firmly, otherwise the fungus will take longer to colonize or suffocate. Please only fill up to approx. 1.5 cm below the edge, then level the surface evenly.
Clean the rim of the glasses well with a clean cloth moistened with alcohol or with a clean cloth moistened with a 10% chlorine solution and fill the remaining 1.5 cm of the container with dry vermiculite. This layer serves as a dry barrier/filter and prevents contamination from outside from entering the substrate.
Now make 4 holes in the lids of the jars using a nail or a drill (2-3 mm diameter) and then seal it. The substrates are later inoculated through these holes.
3. Sterilize the substrate
We recommend using a pressure cooker. Pour about 2 to 3 cm of water into the pressure cooker. Please place the jars on a shelf so that they do not come into contact with water and cover with aluminum foil, so that no condensation can penetrate during autoclaving. If the pot is large enough, a second layer can be made. The second row of jars is arranged offset to the first row. This allows the steam to spread more evenly. Attention - please mind the manufacturer information of your pressure cooker!
The sterilization time is only measured from the point at which the pressure indicator of the pressure cooker has reached the highest level (for domestic pressure cookers) or 121°C / 250°F / 15 psi / 1.05 bar (for professional pressure cookers) - this is 1.5 hours with our PF technology. At the end of the sterilization time, the pressure cooker is placed in a clean place to cool down, preferably in front of a HEPA filter (sterile air flow).
After the steriliser is fully depressurised, open the lid. If the pressure in the pressure cooker drops below zero, place a cloth soaked in Bacillol or 10%
chlorine solution on the inlet valve - the negative pressure causes non-sterile air to be drawn into the pressure cooker. The cloth filters the air once again and reduces the risk of contamination.
Please clean & disinfect hands & forearms thoroughly, use latex gloves if necessary. The substrates are placed in a clean place in front of a HEPA filter or in a glove box until they have cooled down. As soon as they have cooled down to room temperature (below 30°C), they can be processed further.
As soon as the freshly sterilized substrate has cooled down to room temperature (below 30°C), it can be inoculated. If the substrate is not used immediately, it can be stored in the refrigerator (at +2 to +4°C). To do this, the holes in the lid should be sealed with adhesive tape or similar. Close the jars tightly
beforehand and use within 4 weeks.
If you are using ready sterilized PF substrates, start here:
1. Inoculate substrate
Please clean your hand and forearms thoroughly before starting work with hot water and soap. Now clean the work surface and disinfect it with surface
disinfectant. Then put on a hairnet, face mask and gloves. Immediately before starting work, disinfect the gloves with hand disinfectant. Observe the exposure time!
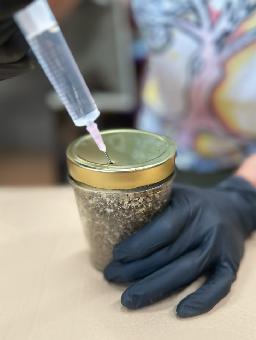
Please shake the spore syringe well before inoculating the substrates so that the spores are evenly distributed in the water. The jars are then inoculated through the 4 holes in the lid.
When using pre-sterilized PF substrates, please remove the adhesive strips from the holes before inoculation - the inoculation holes must remain open after inoculation so that the fungus can breathe! The sealing cap of the cannula is only removed immediately before inoculation.
The needle should not be touched so that it remains sterile. The needle is now inserted through the holes on the inside of the wall of the jar and the spore solution is inoculated into the substrate. The spore solution spreads along the wall and thus reaches a larger surface area. It should be noted that the vermiculite layer on the substrate is not inoculated. It should remain dry so that it can better fulfill its protective function. For 1 jar (containing approx. 400 ml) we recommend about 1 - 1.5 ml of spore solution per hole.
If the needle comes into contact with hands, objects or surfaces, it must be sterilized again. To do this, briefly hold the tip of the needle in a flame (lighter or spirit burner) until the tip of the needle glows red (caution: if the needle overheats, the plastic needle casing may melt). Then allow to cool completely.
2. Mycelium growth
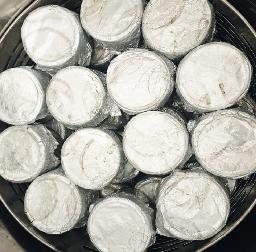
As soon as all substrates have been inoculated, they are placed in a warm (up to 30°C - optimum conditions can be found in the conditions can be found in the individual species), dark place. The substrates are fully colonized with mycelium as soon as they are completely white. Depending on the variety, this takes at least 2 to 3 weeks. The top 1.5 cm, i.e. the dry vermiculite layer, remains uncolonized and no mycelium will form.
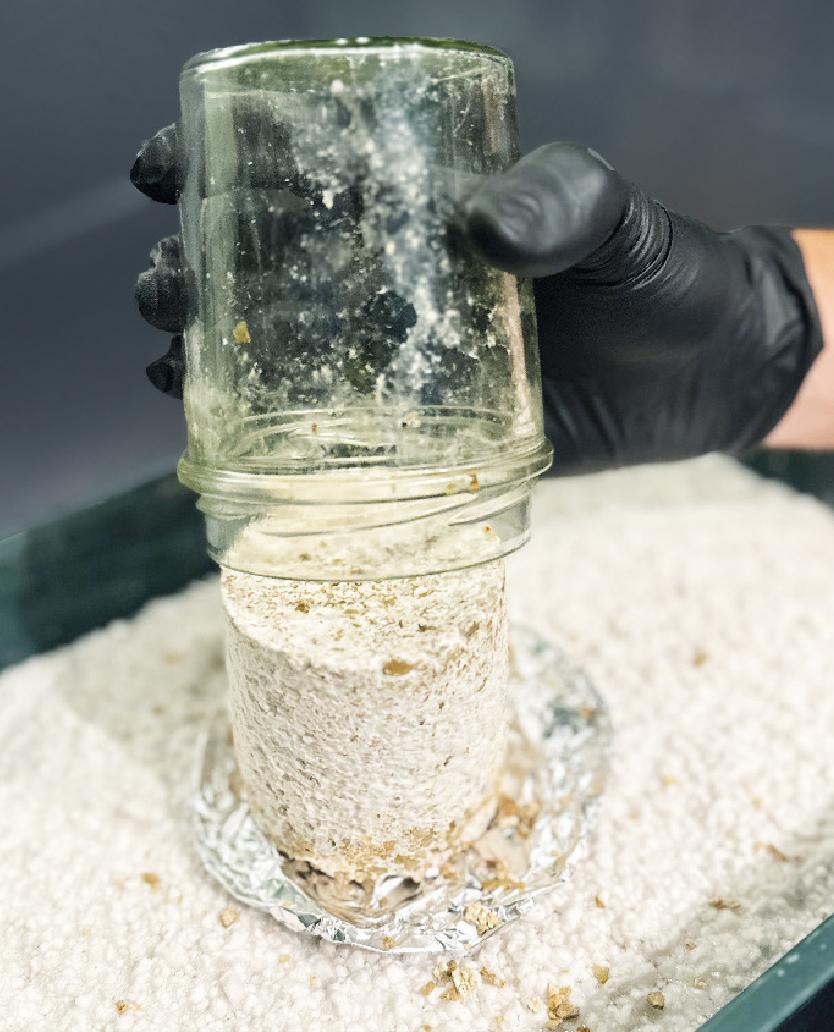
3. Fruiting
The fully colonized mycelium cakes are used for fruiting (if only one spot, with the exception of the vermiculite layer, is uncolonized the probability of a mold infestation, for example, is much higher.) with washed and disinfected hands from the jars. The dry, loose vermiculite on the top is removed by gently
shaking or with a suitable disinfected object. Please place the cake in suitable environmental conditions for “primordia formation”. After the first mini mushrooms (Primordia) have appeared, please change the temperature and humidity according to the variety to “fruiting”. Depending on the variety, the mushroom needs 2 or more weeks from setting up to the first appearance of the mini mushrooms